RevenueCat makes managing in-app purchases and subscriptions a lot simpler by providing a wrapper around Apple's StoreKit and Google Play Billing services. They also offer a robust and scalable backend infrastructure for in-app payments along with built-in purchase validation logic.
RevenueCat makes managing in-app purchases and subscriptions a lot simpler by providing a wrapper around Apple's StoreKit and Google Play Billing services. They also offer a robust and scalable backend infrastructure for in-app payments along with built-in purchase validation logic.
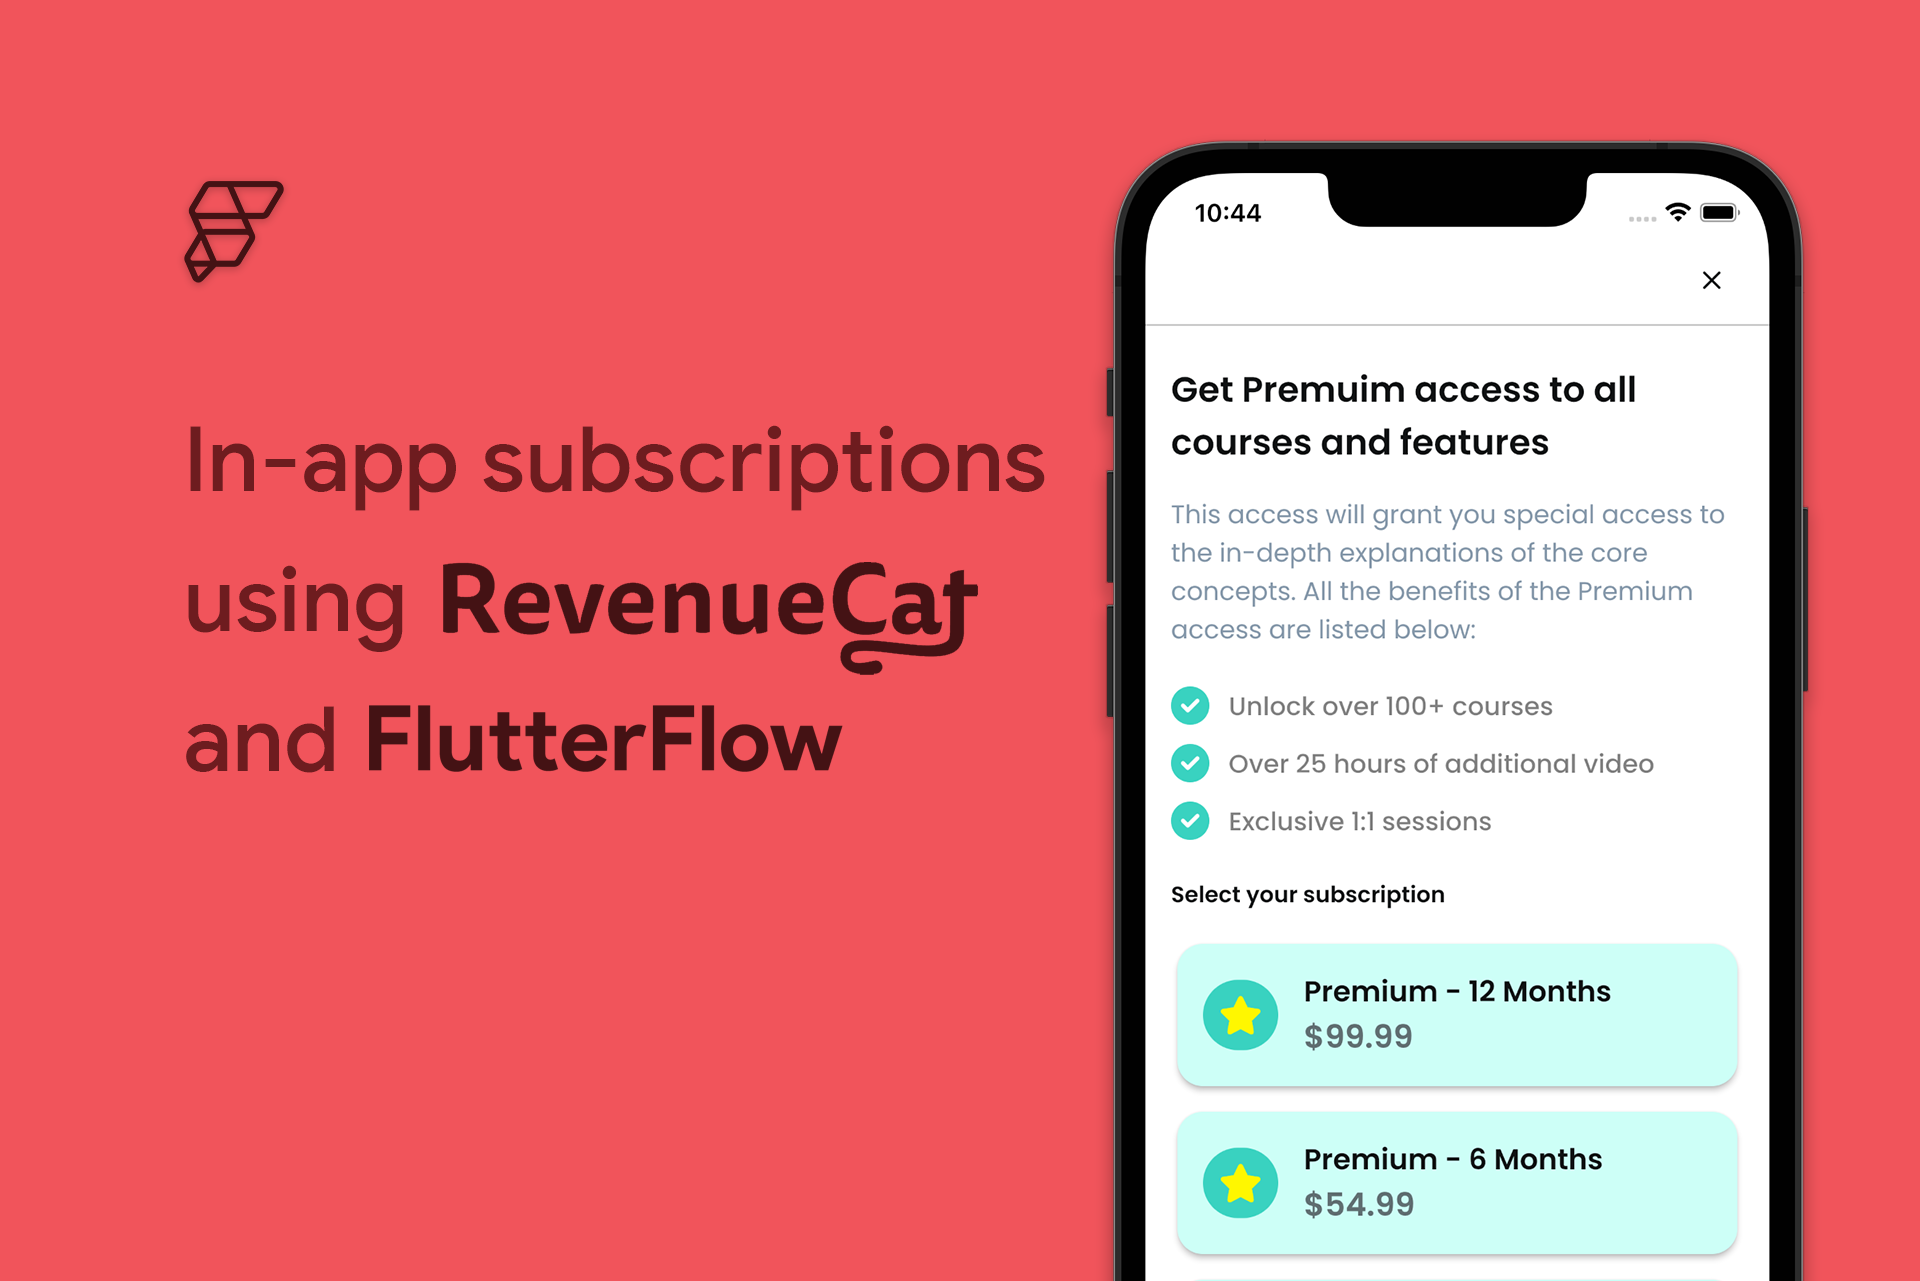
In this article, you will learn to configure in-app subscriptions in your FlutterFlow app with the help of RevenueCat integration.
⚠️ In-app purchases and subscriptions using RevenueCat only work on Android and iOS platforms. FlutterFlow doesn't support in-app purchases on Web, macOS, Windows, and Linux.
Getting Started
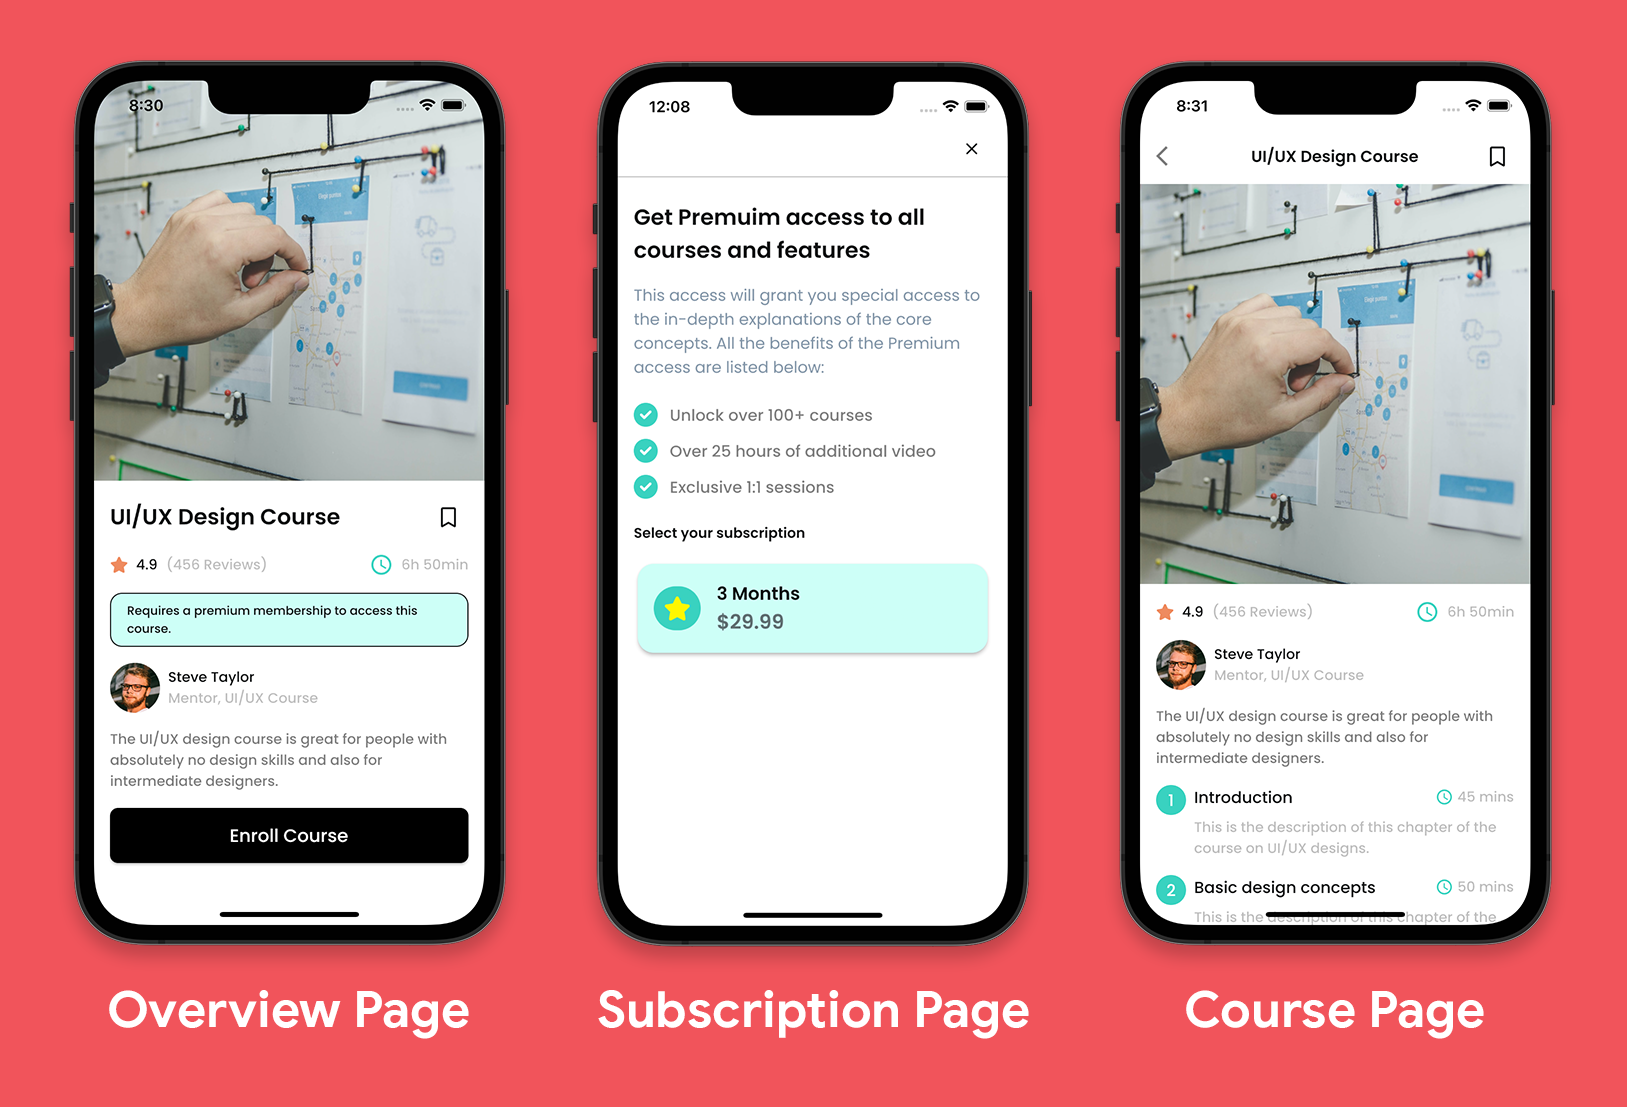
As this article focuses on integrating subscriptions, we won't be designing the primary app interface from scratch. To help you follow along, we have created a starter project that you can clone from here.The starter project is a part of an education app where users can get access to a bunch of courses and features by subscribing to the Premium membership. It mainly consists of three screens:
- Overview Page: Shows the details of a course that the user can get access to by purchasing the Premium subscription.
- Subscription Page: Lists all the different Premium subscription plans (3 months, 6 months, and 12 months).
- Course Page: This page can only be accessed by users who have already purchased a Premium subscription.
To integrate in-app purchases in your app, first, you need to deploy it to Google Play Store and Apple App Store (or, you can release your app on a single platform if you want).
You can deploy your apps directly from FlutterFlow by going to Settings and Integrations > Mobile Deployment.
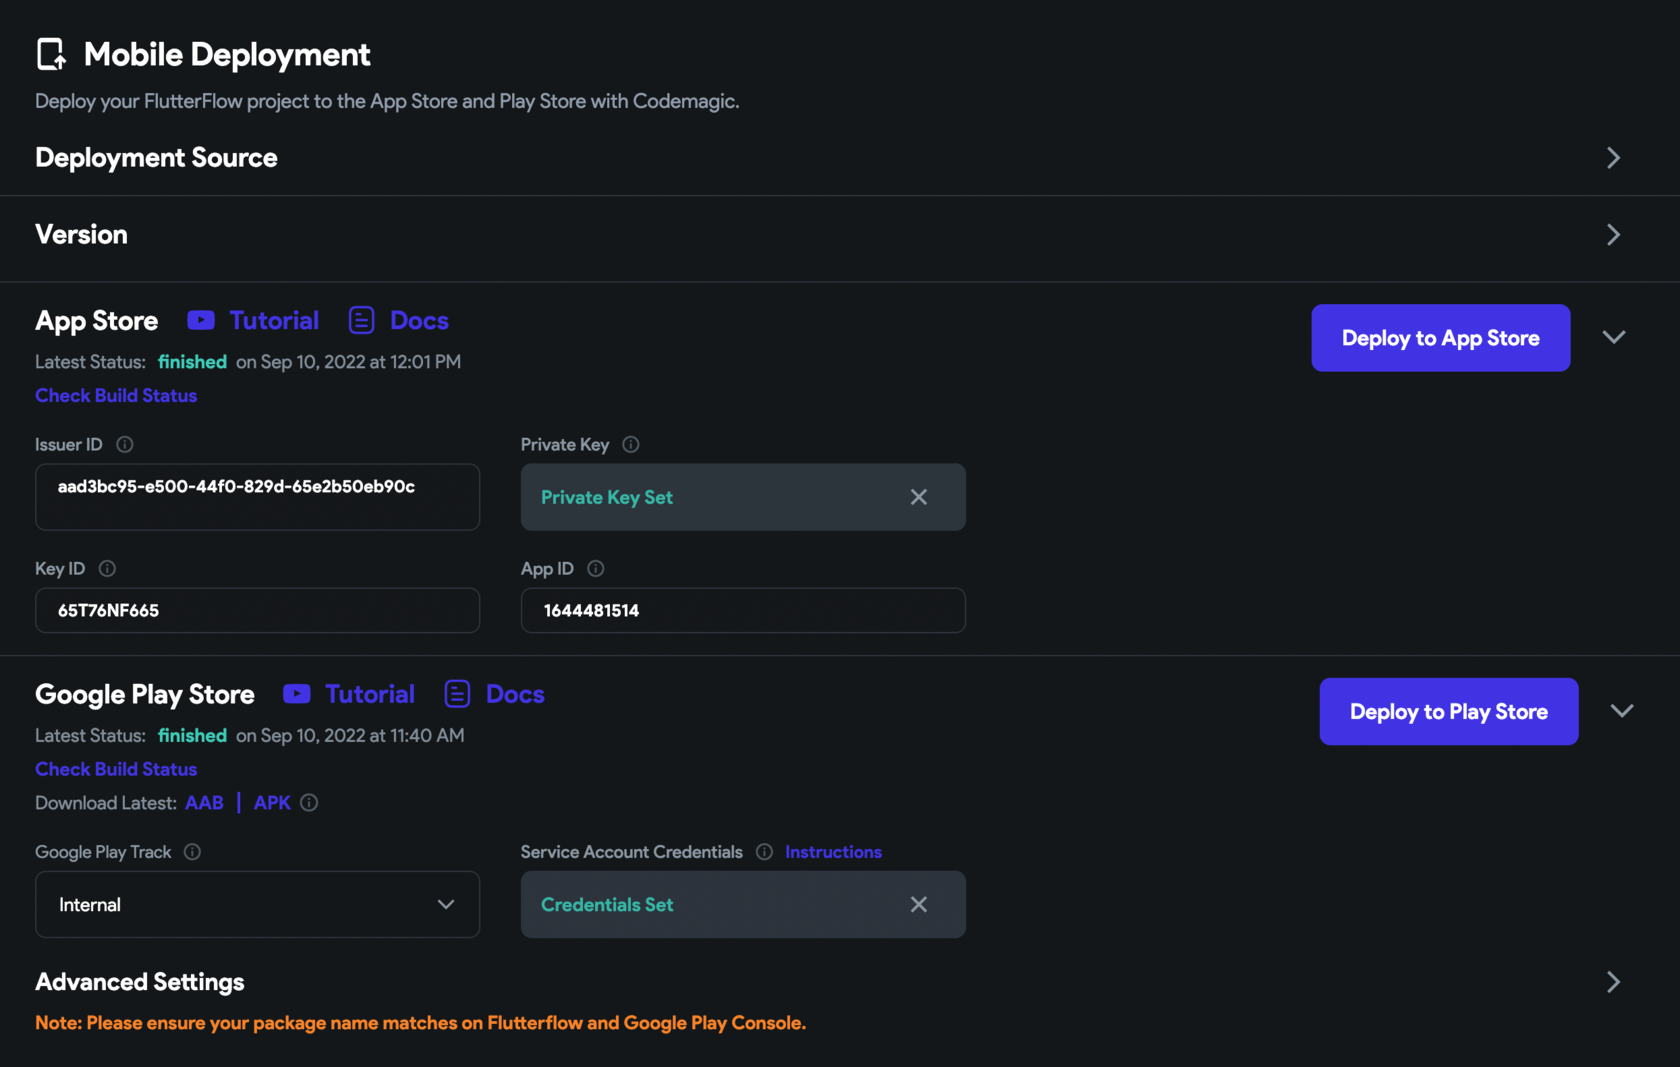
Follow these guides to configure and deploy your app:
- Google Play Store Deployment (follow up to test track deployment [4.3])
- Apple App Store Deployment
Once your app is successfully deployed, you are ready to move to the next step and set up subscriptions for your Android and iOS apps.
Setup subscriptions
You need to define subscriptions on Google Play Console and Apple App Store Connect before connecting with RevenueCat.
Play Store subscription setup
For configuring subscriptions on Google Play Console, follow the steps below:
- Go to Google Play Console. Log in with your developer account.
- Select the app in which you want to add subscriptions.
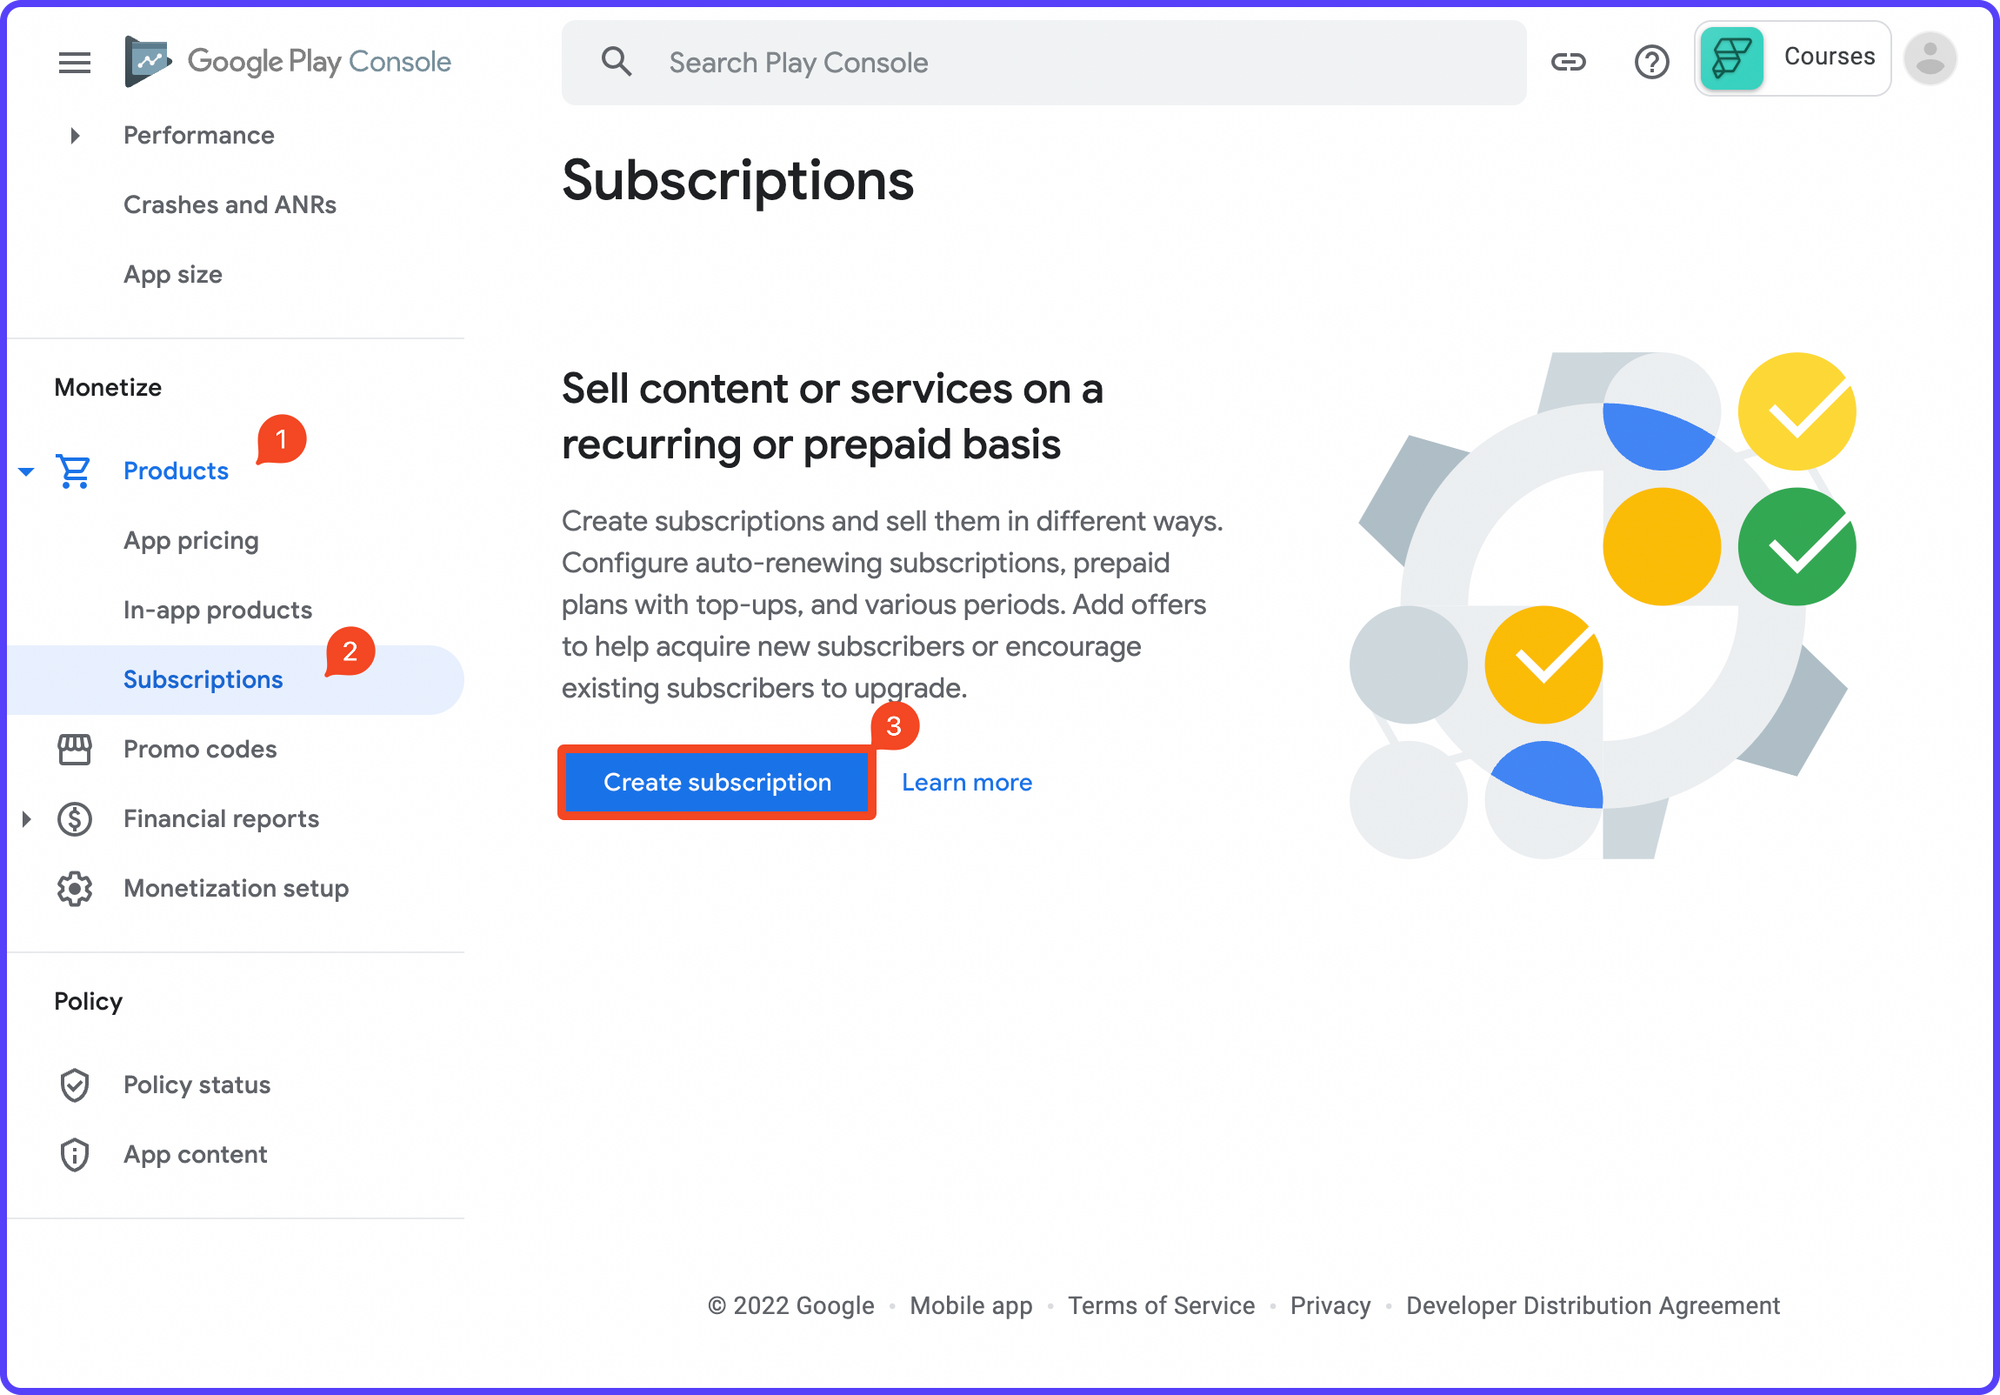
- From the left menu, under the Monetize section, expand the Products category. Select Subscriptions.
After selecting subscriptions, you might see the following message:
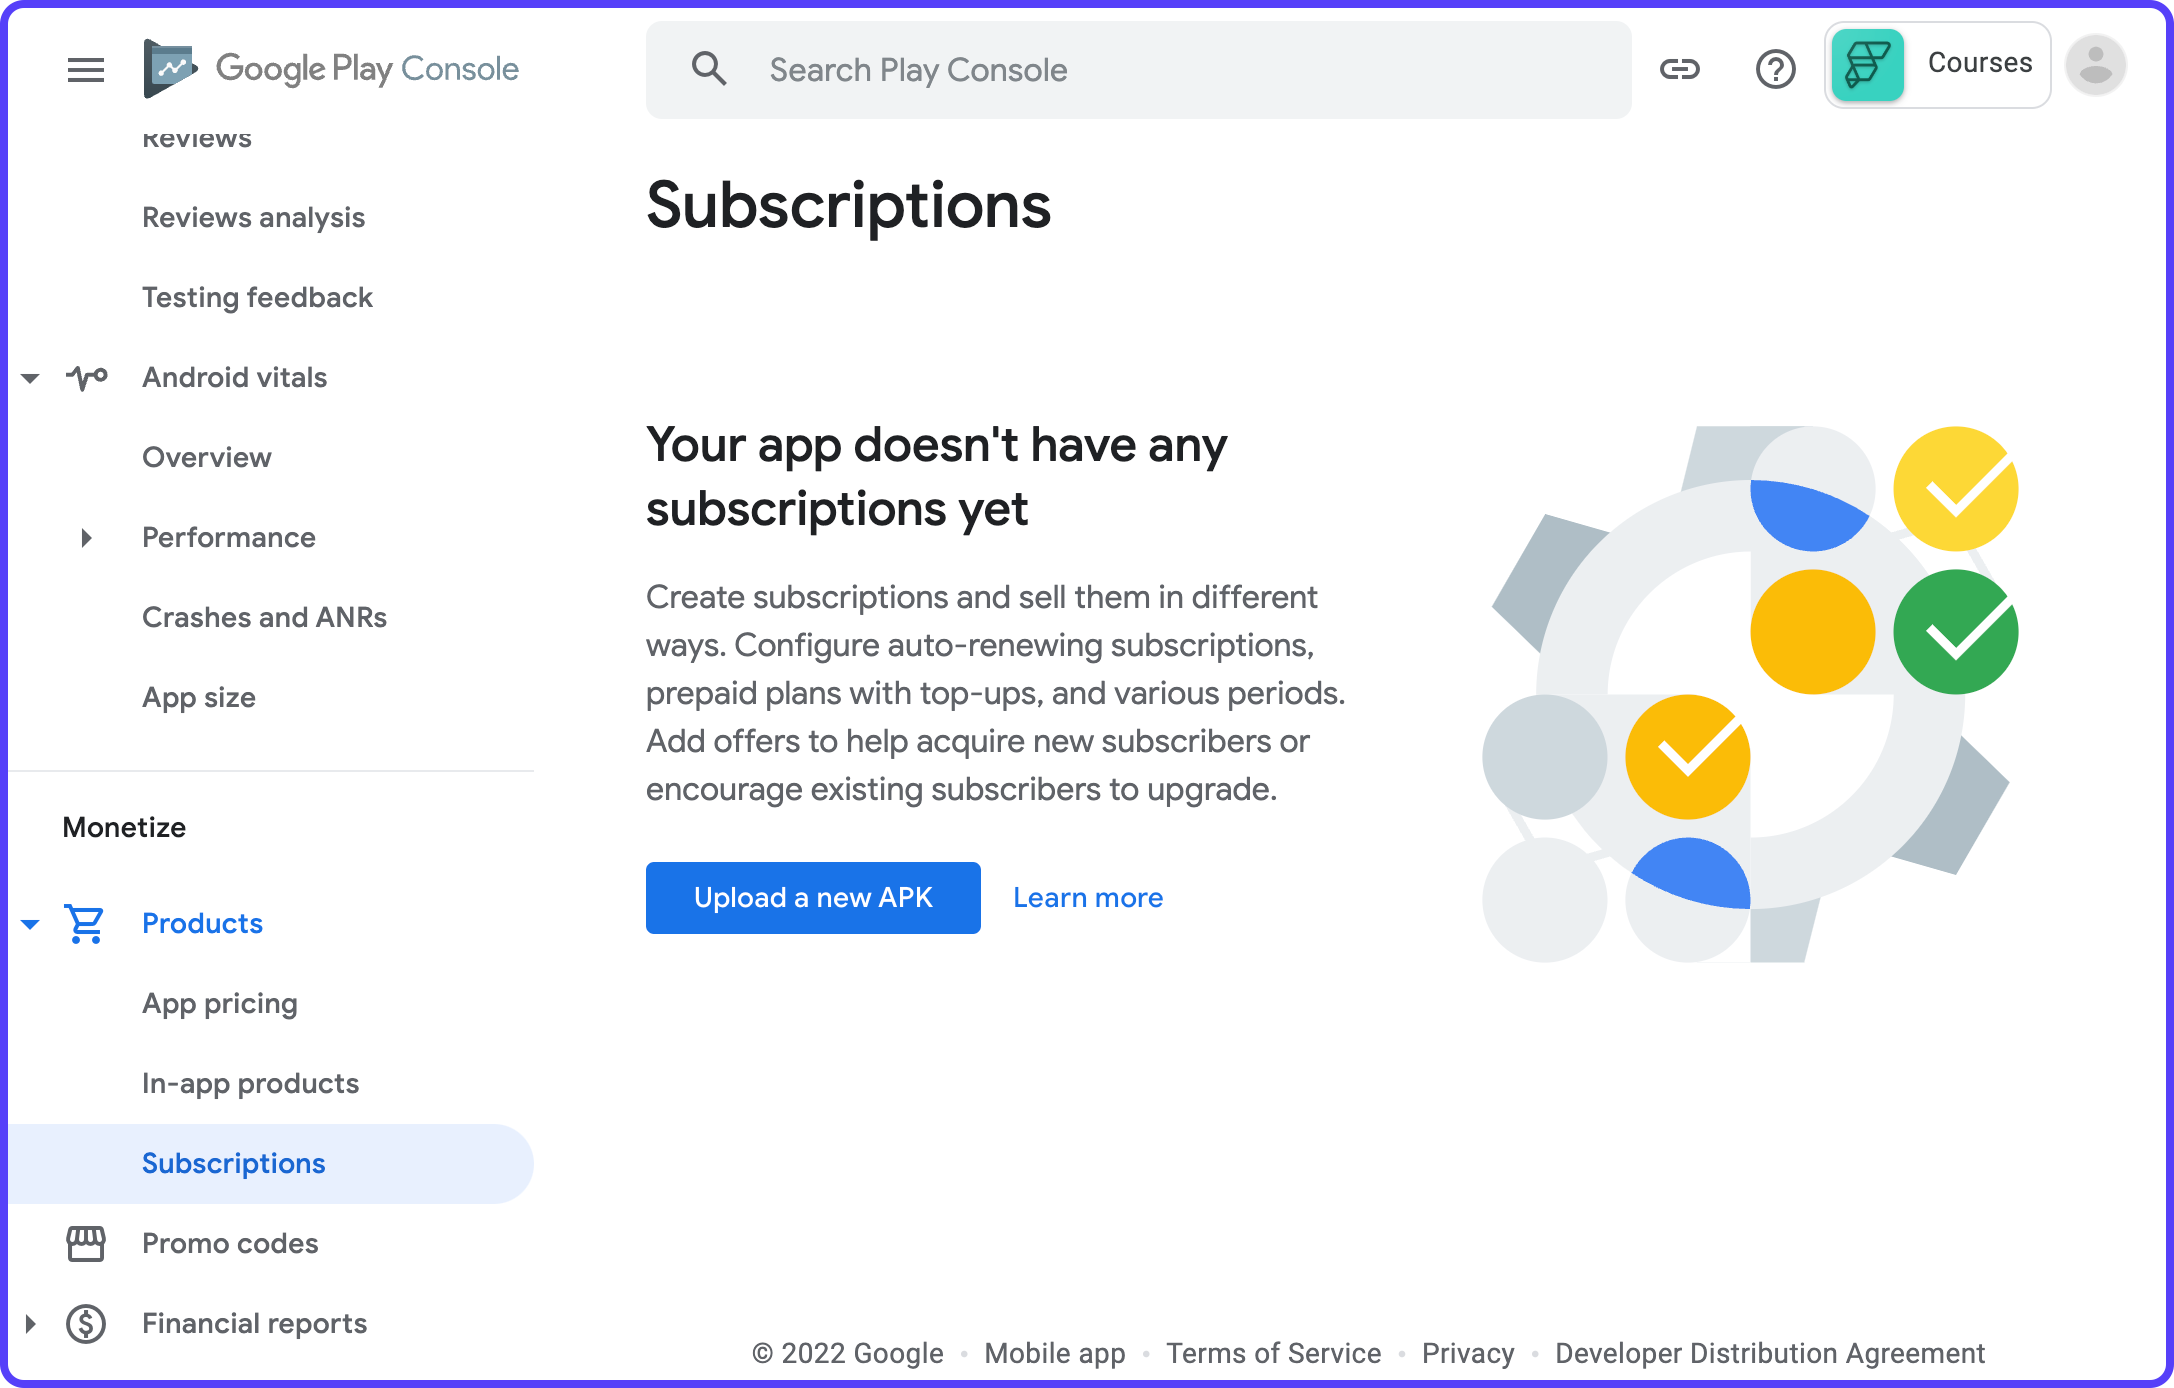
To solve this, do the following:
- Go to your FlutterFlow project.
- Navigate to Settings & Integrations > RevenueCat page (under In App Purchases & Subscriptions section).
- Enable RevenueCat using the toggle.
- Enter any string as your App Store Key and Play Store Key (eg. testkey). We'll be updating it later.
- Go to the Mobile Deployment page and deploy your app again to Google Play Store.
Wait for the Play Store deployment to complete. Now, go back to the Subscriptionspage from the Google Play Console. You should see that message is gone, and you will be able to create subscriptions.
⭐ Some more context on why you had to perform the above steps – to set up subscriptions on Google Play Console, the AAB/APK build file uploaded should have the BILLING permission enabled. Enabling RevenueCat on FlutterFlow adds that billing permission to your app.
Let's start creating the subscriptions:
1. From the Monetize > Products > Subscriptions page, click Create subscription.
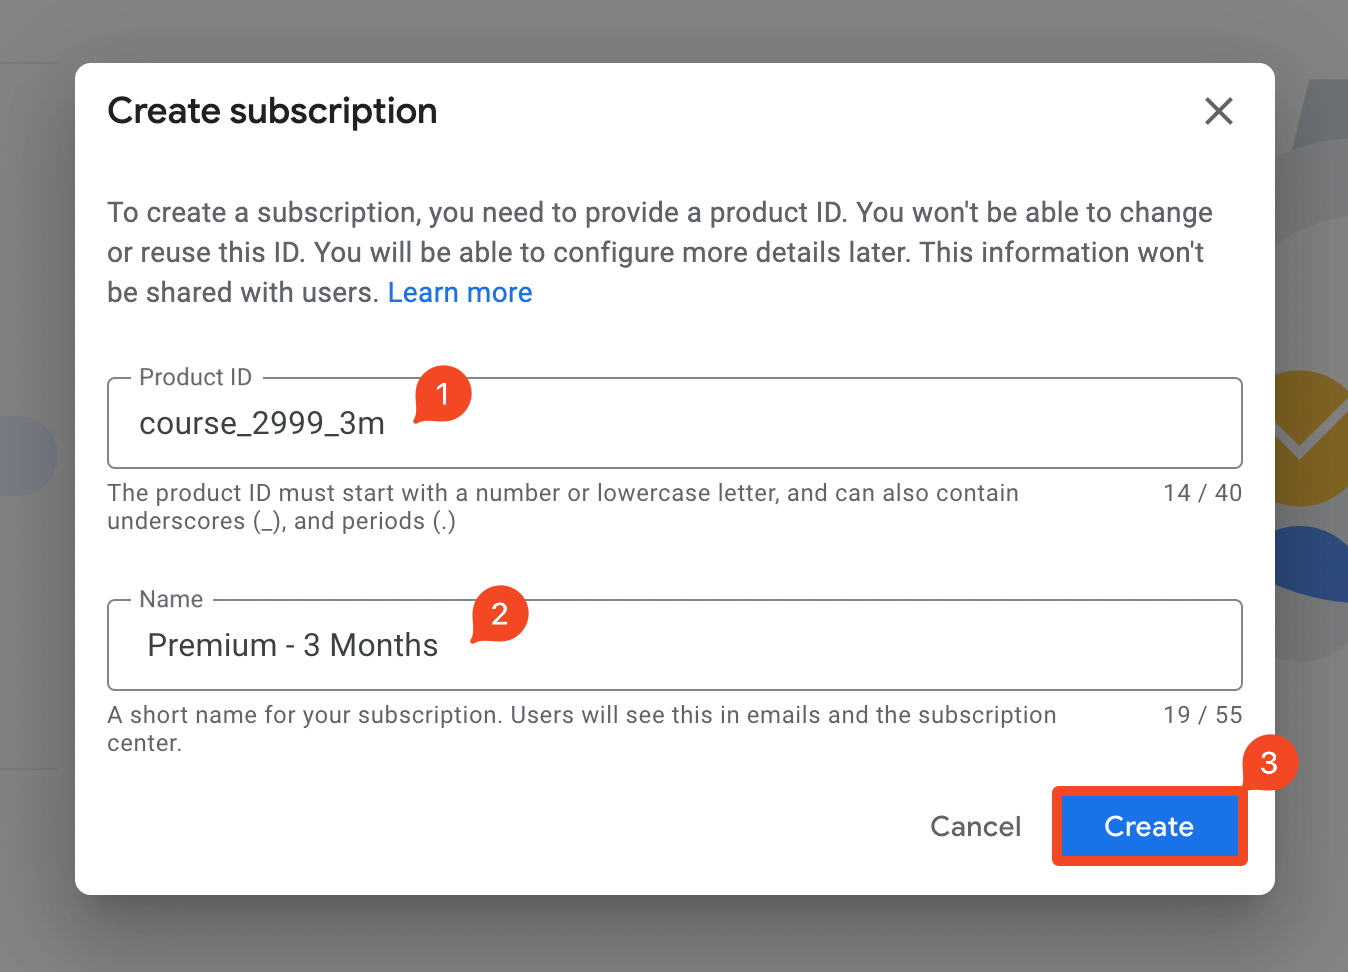
2. Enter a unique Product ID for your subscription and a publicly viewable Name. Click Create.
For example, we will be creating a subscription for 3 months with:
- Product ID: course_2999_3m
- Name: Premium - 3 Months
⚠️ You won't be able to change or reuse a Product ID across any of your apps, even if the product is deleted.
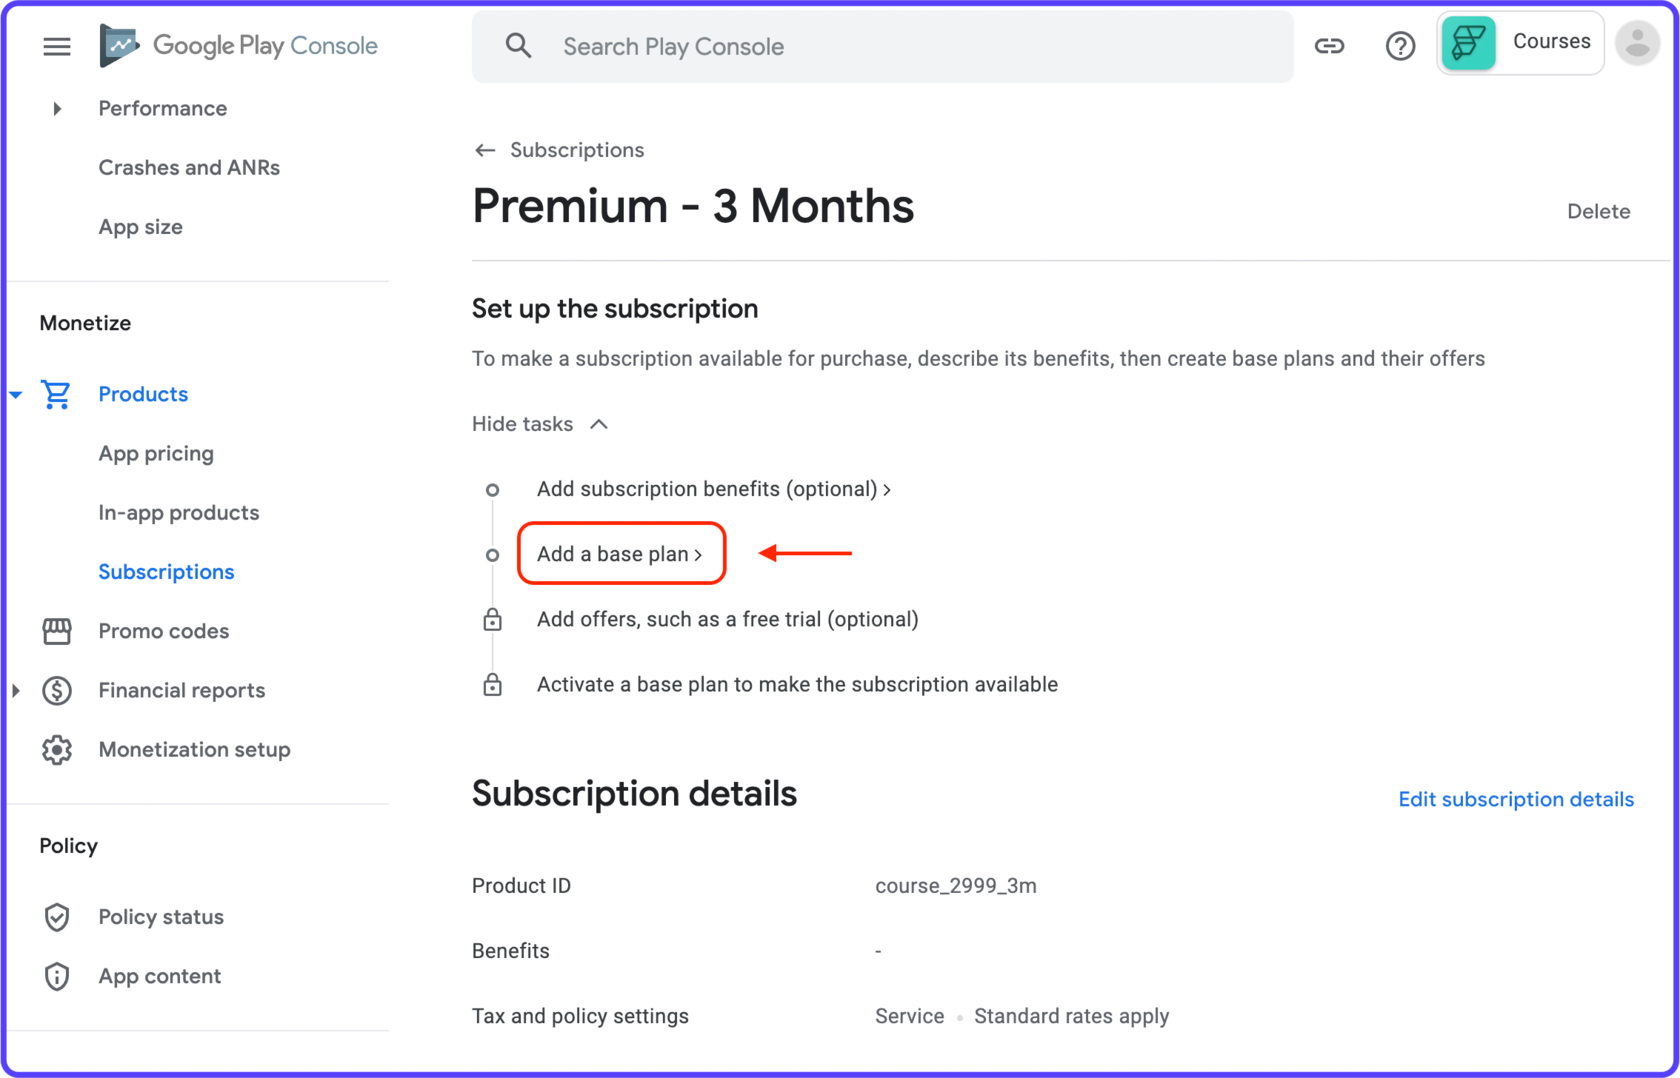
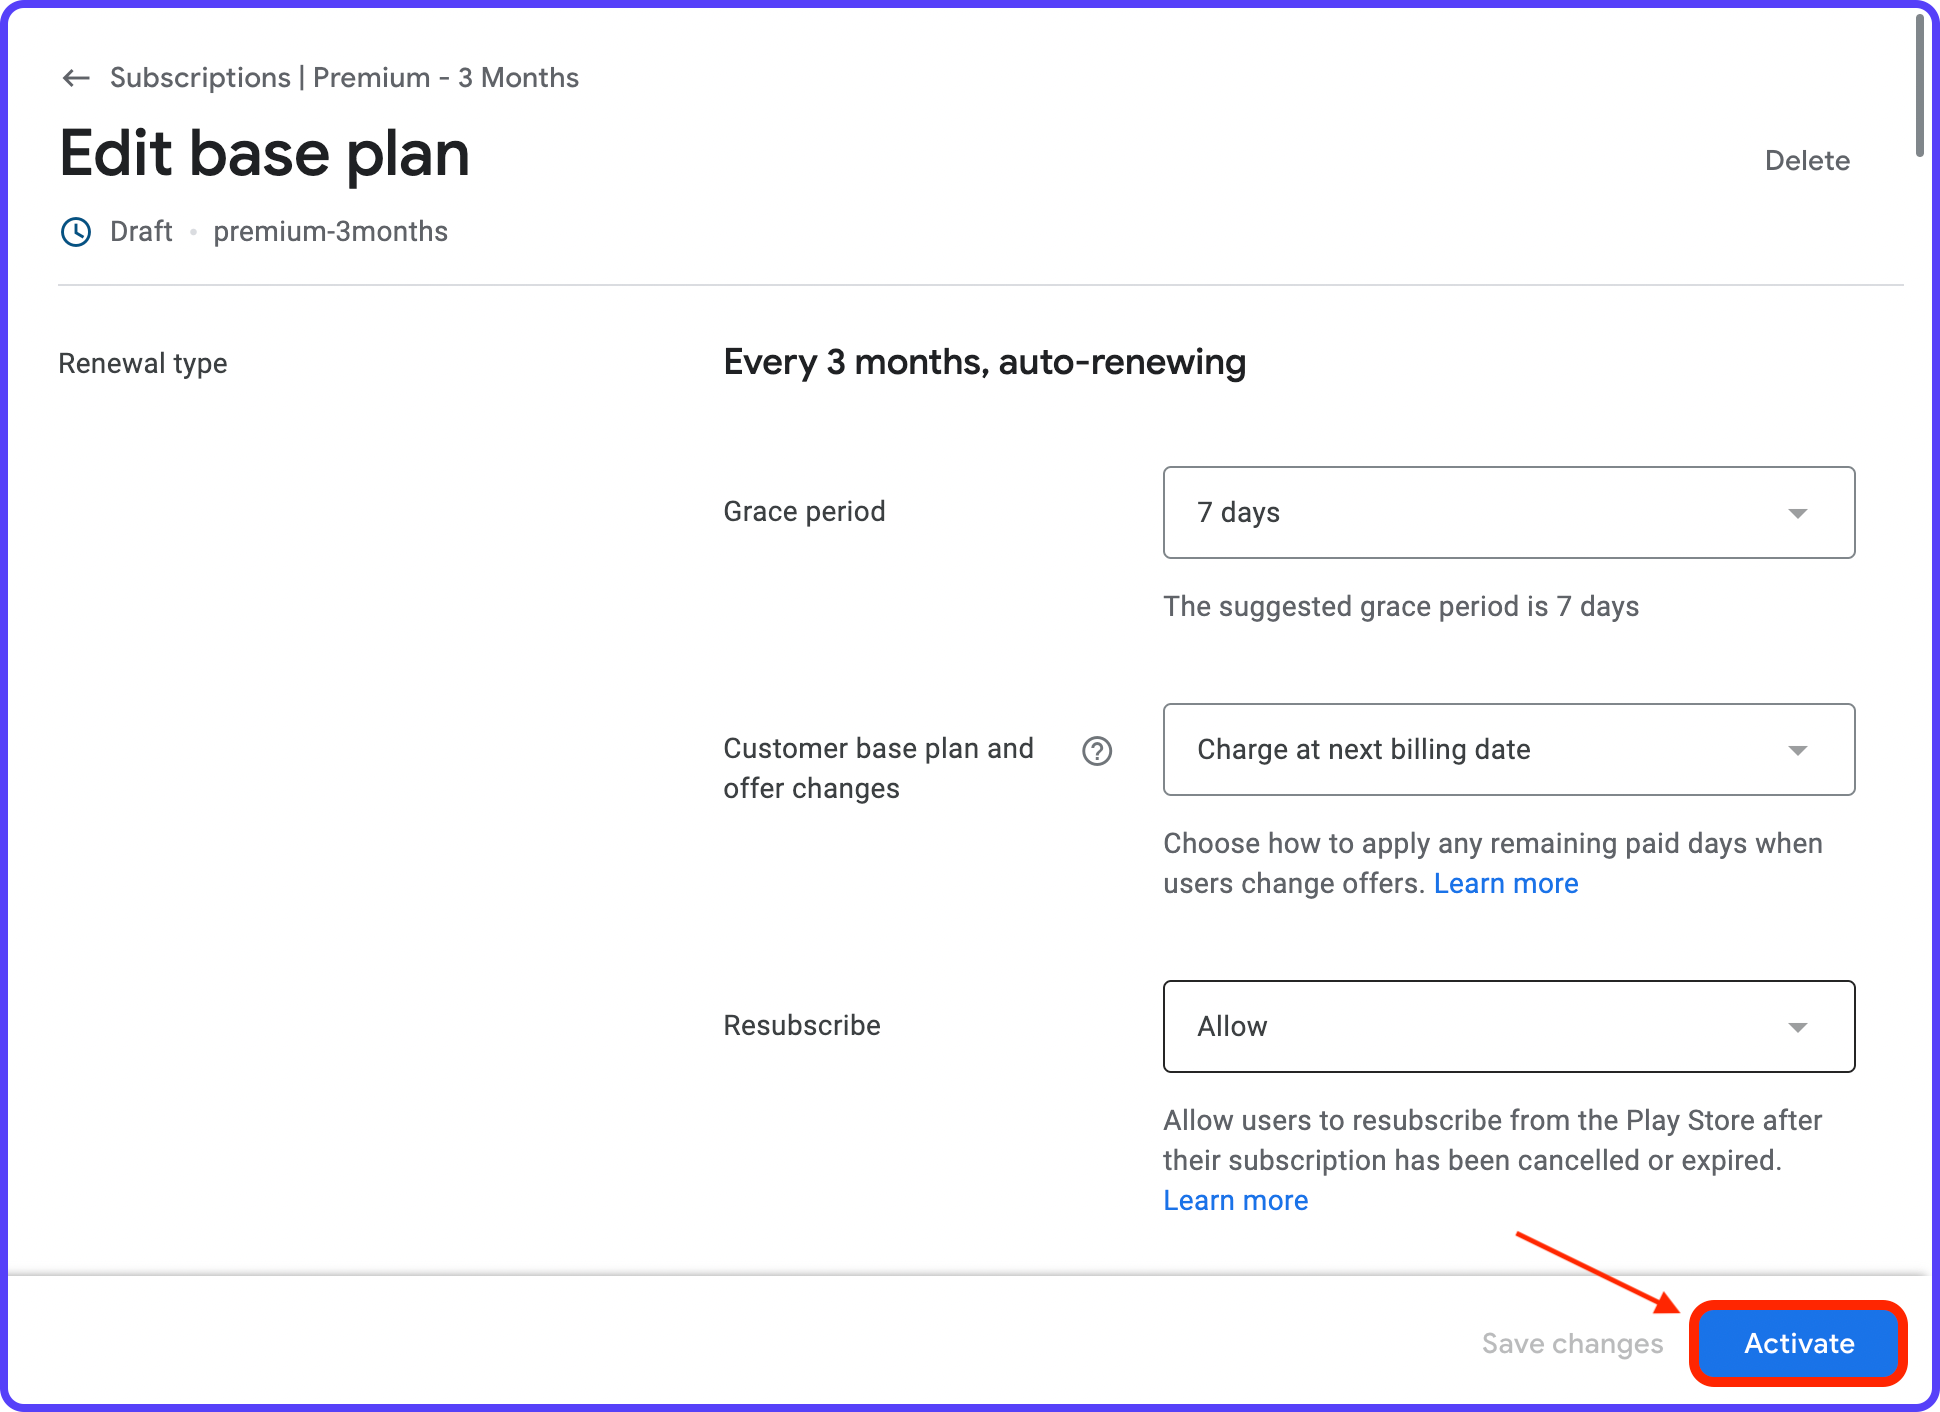
3. Click "Add a base plan".
4. Enter the Base plan ID, Renewal type (RevenueCat supports only Auto-renewing), Tags, and Price. Click Save.
⚠️ NOTE: It's not allowed to change or reuse the Base plan ID once it has been created.
? While setting the Price, you can define it in your preferred currency and it should autofill for other local currencies along with their taxes.
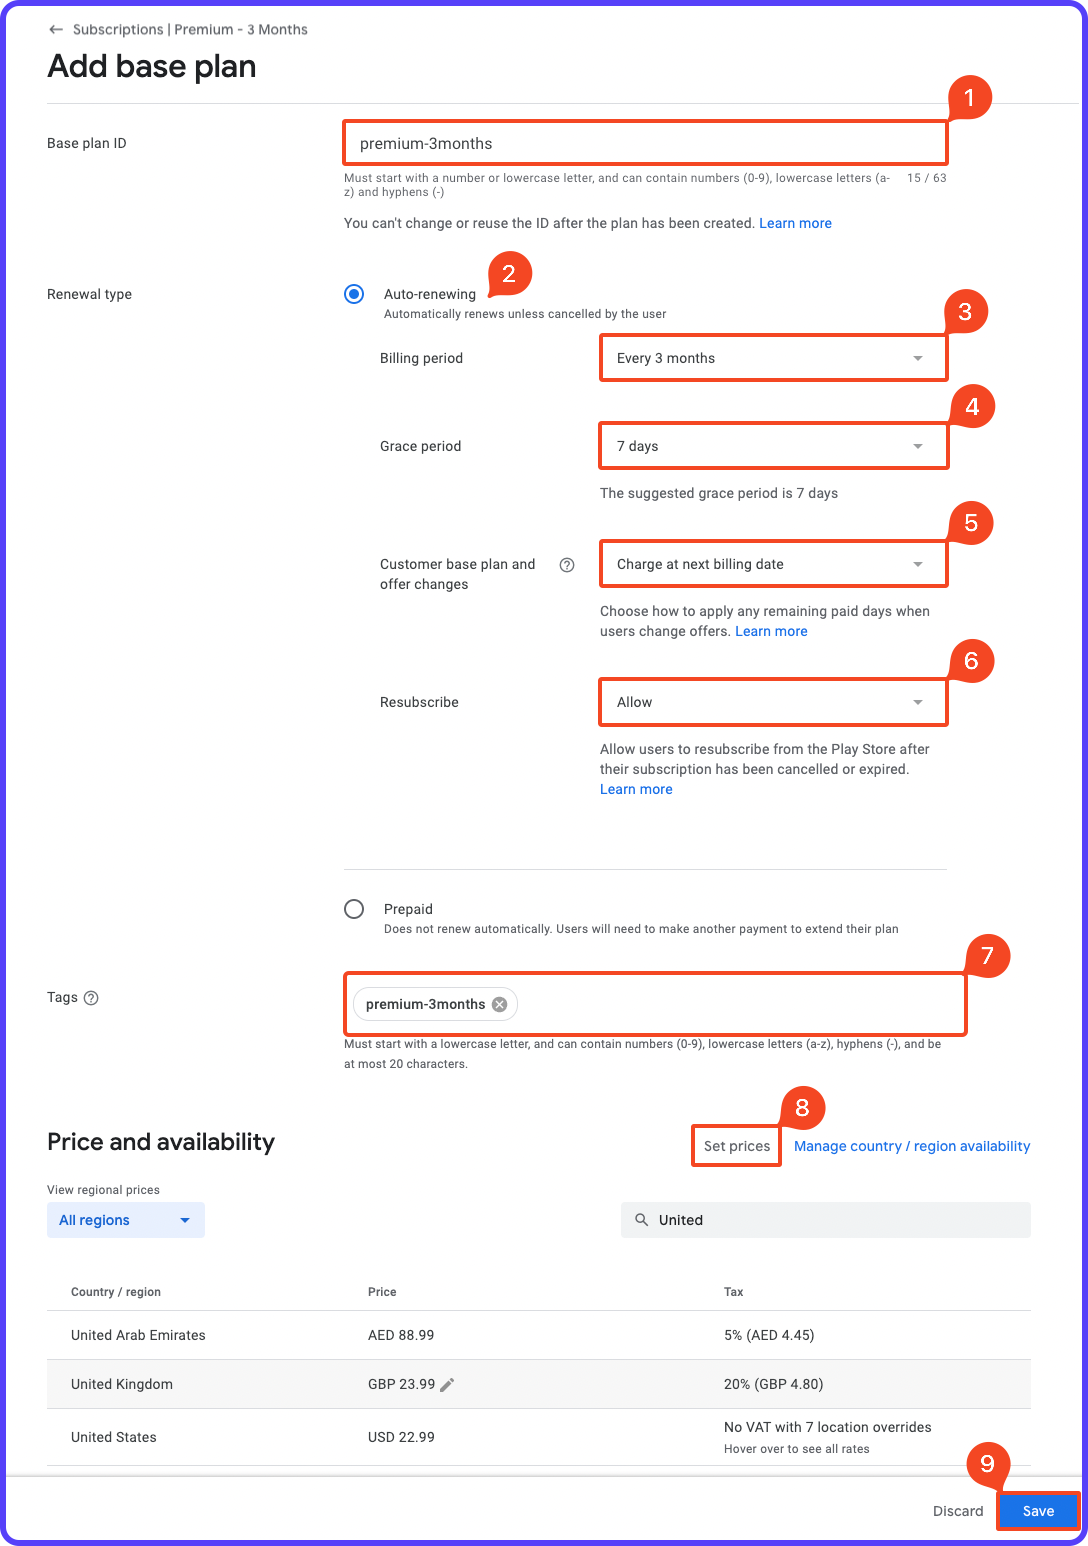
5. Click Activate.
6. Similarly, add two more subscriptions for 6 months and 12 months.
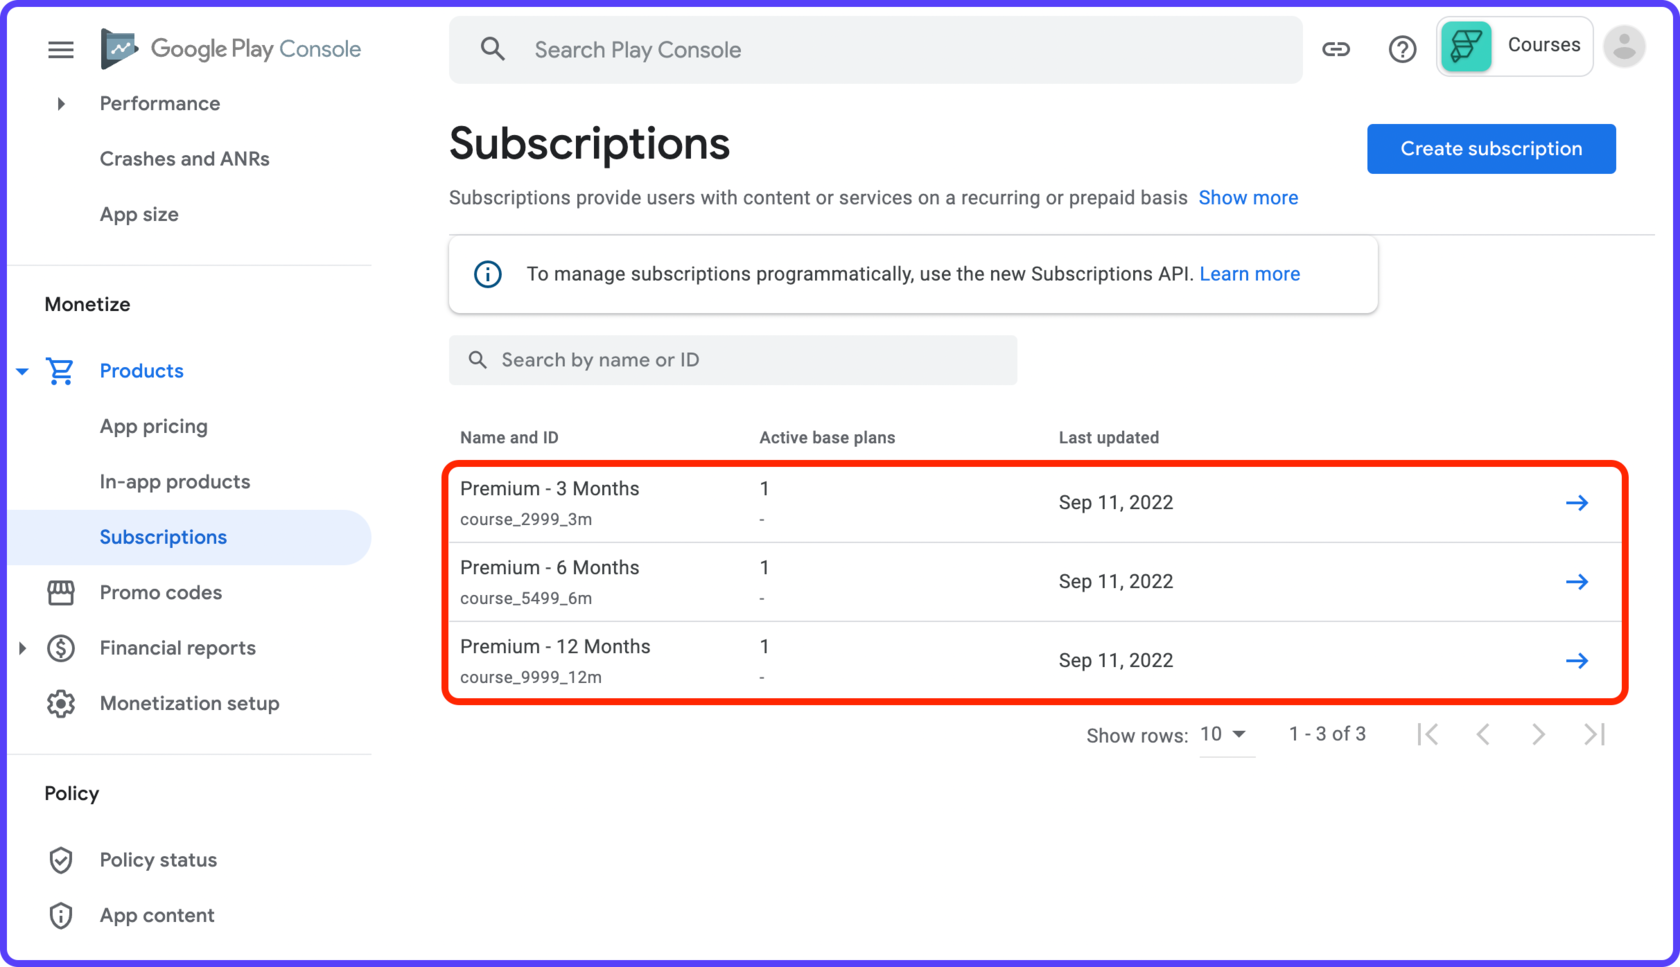
We have used the following details for the subscriptions:
Product ID: course_2999_3m
Name: Premium - 3 Months
Description: Get Premium membership for three months.
Billing Period: 3 Months
Price: $29.99
Product ID: course_5499_6m
Name: Premium - 6 Months
Description: Get Premium membership for six months.
Billing Period: 6 Months
Price: $54.99
Product ID: course_9999_12m
Name: Premium - 12 Months
Description: Get Premium membership for one year.
Billing Period: 12 Months
Price: $99.99
That completes the subscription setup for the Google Play Console. Let's move on to the App Store subscription setup.